Installing Advanced Shipping for WooCommerce
First of all; Thank you for choosing Advanced Shipping for WooCommerce to be your shipping plugin of choice. Installing the plugin can be done like any other plugin on a WordPress website. Do be aware that when you first download the plugin it may have to be unpacked. Check this by unpacking the file you downloaded and see if there’s another .zip file in there (the uploadable file) or if the woocommerce-advanced-shipping.php file is available immediately (the downloaded file can be uploaded).
Installing Advanced Shipping through the plugins page
The easiest way to upload a plugin is through the plugins page. Follow these steps to install a plugin:
- Open your WordPress site
- Go to the ‘Plugins’ page
- Click on ‘Add new’ at the top of the page to add a new plugin
- Upload the .zip file with the actual plugin files (remember you may have to unpack the downloaded file from CodeCanyon).
- Activate the plugin
Thats it! The new plugin version is now installed.
Can’t upload? It could be your site is restricted and does not allow plugins to be uploaded through the plugins page. Try the below instead.
Installing Advanced Shipping through FTP
Installing a plugin through FTP requires you to have access to your sites FTP. These credentials should be available through your hosting partner. Follow these steps to install the plugin.
- Open your favourite FTP application (for example FileZilla) and login to your hosting server.
- Go to the “wp-content/plugins/” folder of your site.
- Unpack the actual plugin file so you only have a folder (not a .zip file)
- Upload the plugin folder into the ‘plugins’ folder on your server.
- Go to the ‘Plugins’ page on your site to activate the uploaded plugin.
Updating Advanced Shipping for WooCommerce
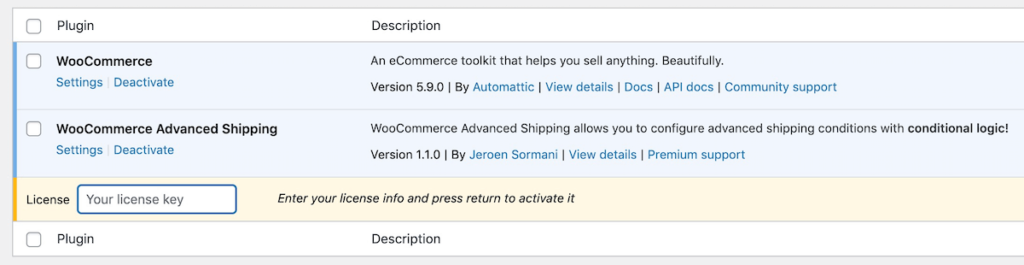
As of version 1.1.0 of the plugin you can get receive dashboard updates of the Advanced Shipping plugin. This means that you no longer have to manually update the plugin by uploading a new version. In order to receive dashboard updates you need to enter (press return to save) a supported license key for the plugin on the ‘Plugins’ page.
When a update is available for the plugin it will be displayed here and you can download the update directly from the plugins page.
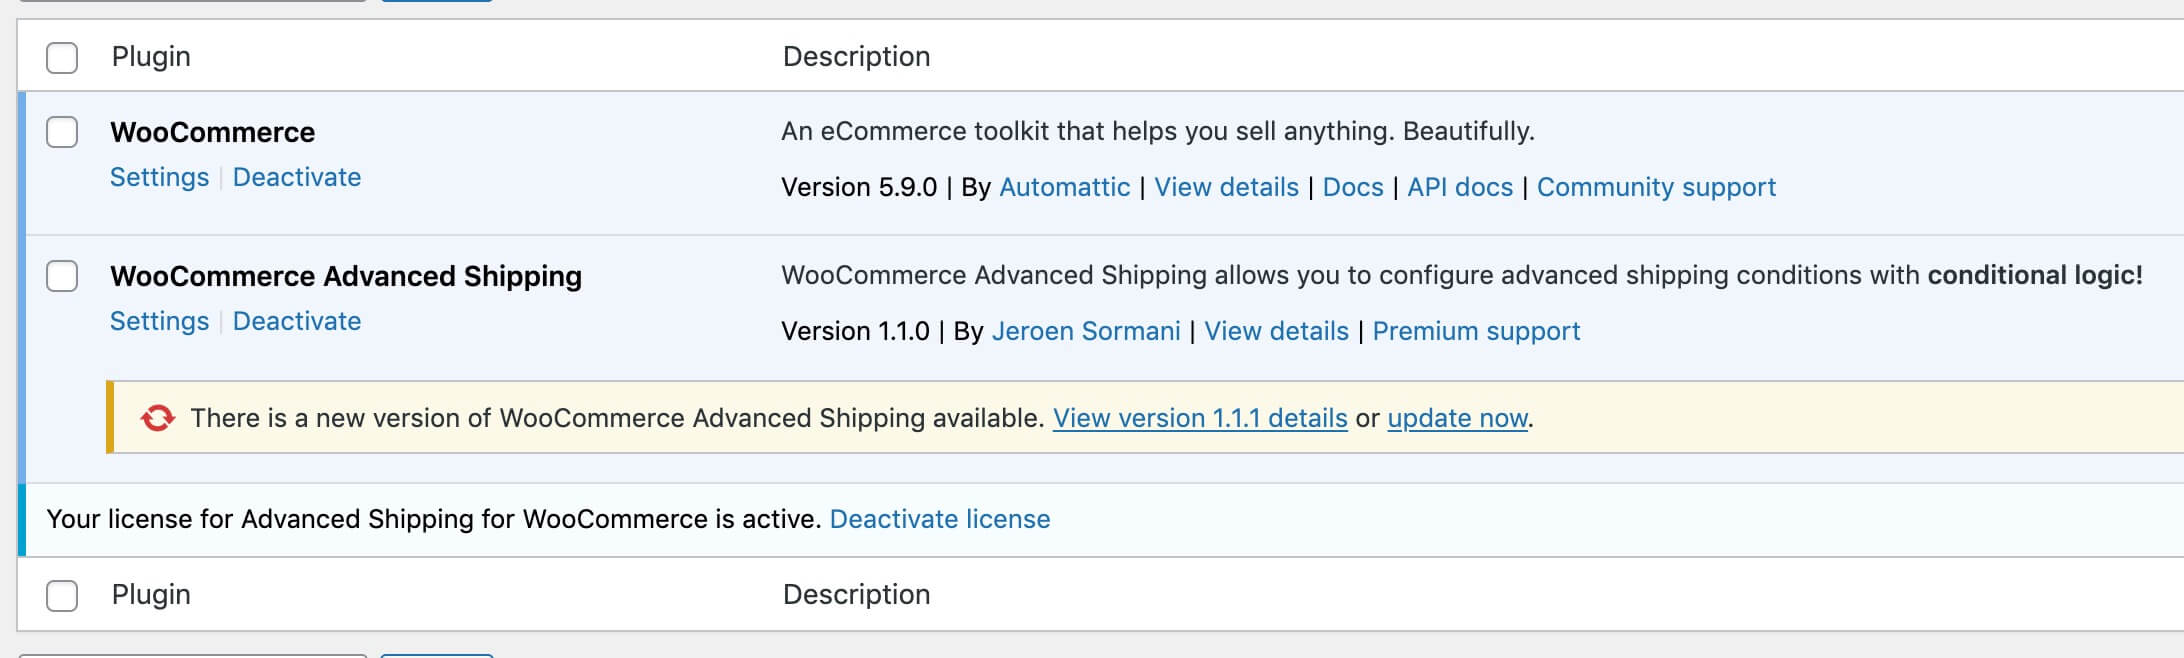
All configured shipping rates are saved in the database. Meaning you can safely update without losing your configuration.
Manually Updating Advanced Shipping
Updating a plugin is very similar to the steps above for installing the plugin. The additional steps would be to deactivate and delete the previous version of the plugin first before installing the latest. Here’s a step-by-step list.
No settings will be lost by going over these steps.
- Go to CodeCanyon to download the latest version of the plugin
- Deactivate and remove the existing version of the plugin
- Click on ‘Add new’ at the top of the page to add a new plugin
- Upload the .zip file with the actual plugin files (you may have to unpack the downloaded file from CodeCanyon).
- Activate the plugin
Updates when *Your license has expired*
Purchasing a plugin through CodeCanyon provides you with lifetime updates. Advanced Shipping also provides that; however this is only by manually updating through CodeCanyon as a supported license key is required to receive dashboard updates.