The holidays are coming up again soon, including Black Friday and Cyber Monday. These are great times for your store to promote your products and provide a sale to your customers. Make sure your customers know that there’s a sale going on and which products are discounted by labelling/tagging them. Highlighting these products has a conversion increasing effect on your potential customers.
Tagging Products
The first step is to identify the products that are in the sale. This can be done various in various ways, for example through the ‘Tag’ system, giving them a specific category or using shipping classes.
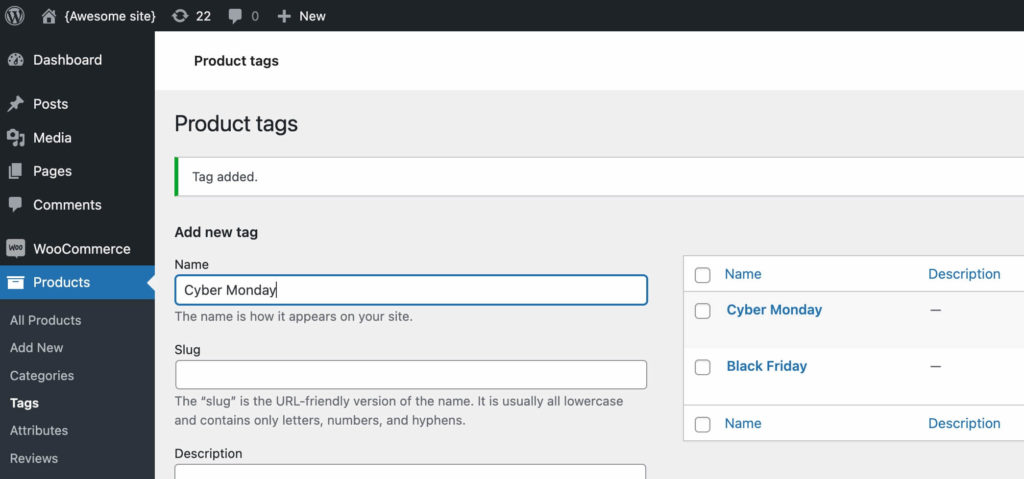
To use tags, go to the WooCommerce > Products > Tags page to create a new tag for this sale. Depending on your site tags can be visible on the front-end. This means you have to make sure you plan ahead to when you want to let customers know about this.
Tags can then be assigned on the edit product page directly (they can also be created there).

Categories and tags are pretty much the same, so setting this up with categories also works the same way. Categories obviously are also visible on the front-end to the customer.
The benefit of categories and tags is that it will also be possible to link to / customers view all products within them. Allowing them to browse all the sale items on one page.
Shipping classes are compared to the tags and categories ‘low key’. The customer never knows what shipping class a product has as its never used on the customer facing side of things.
Creating a Black Friday Label
Now that you’ve prepared your products the next step is to create a label. For this you can use the WooCommerce Advanced Product Labels plugin. After installing the plugin, head over to the WooCommerce > Settings > Product Labels section to create a new label.
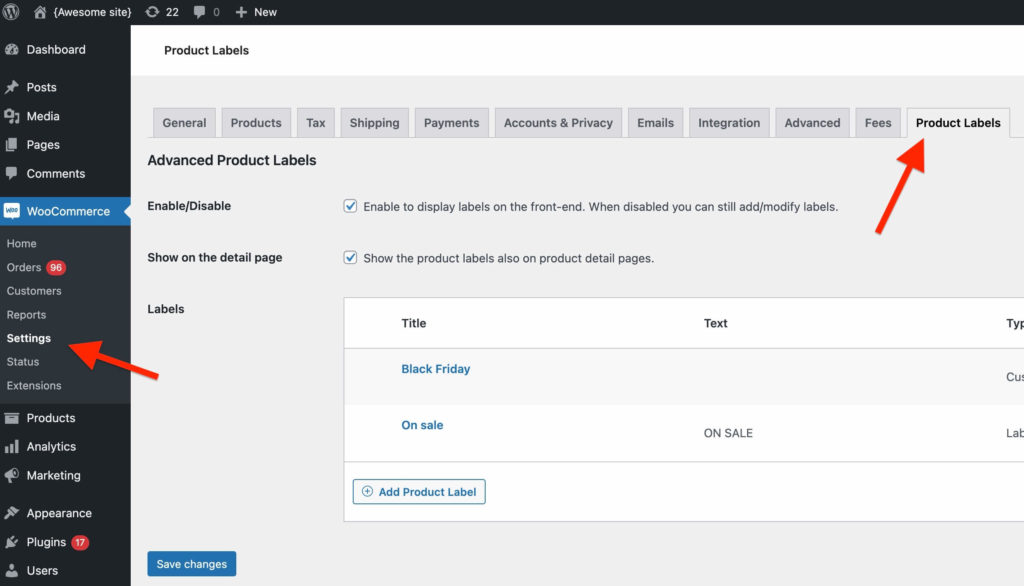
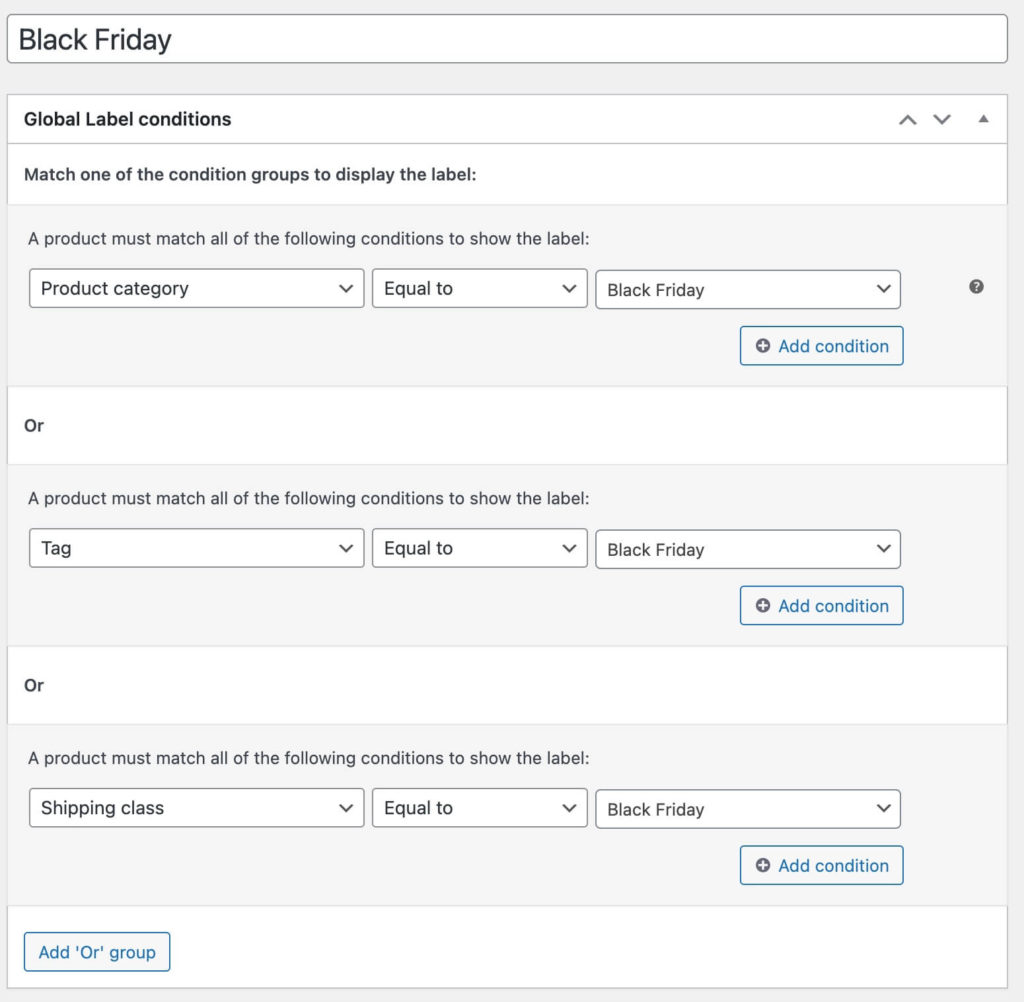
When creating a new label you see two separate sections; one for configuring conditions to target which products the label should be shown on, the other for configuring the label itself.
In the top section you can use the ‘Tag’, ‘Category’ or ‘Shipping class’ conditions depending on how you’ve setup the products earlier.
Configuring the Black Friday Label
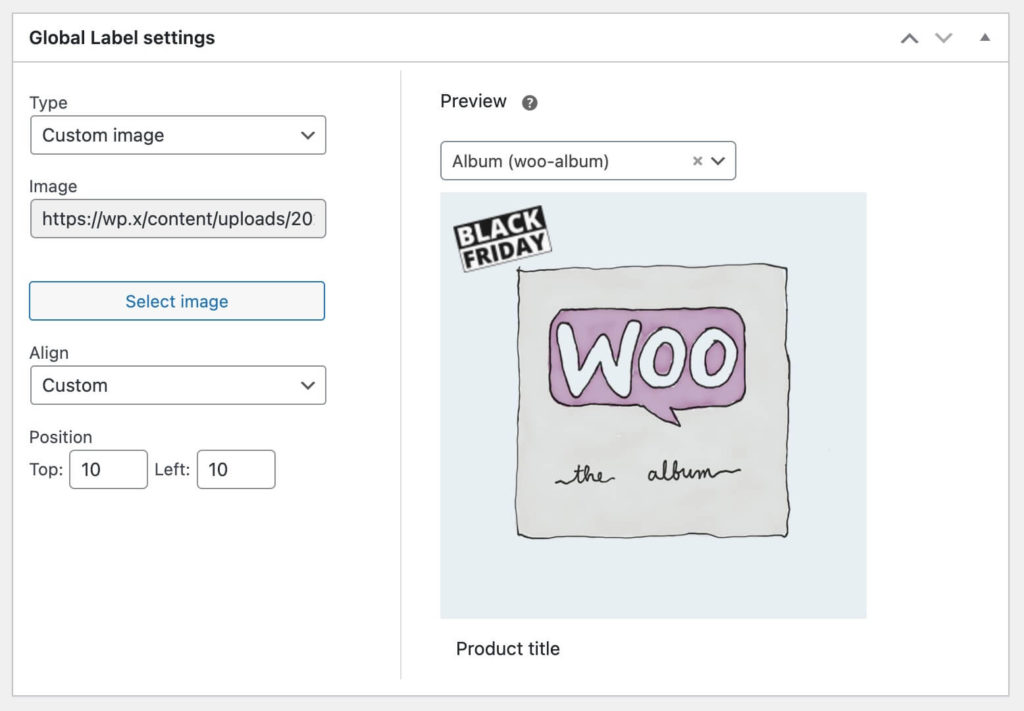
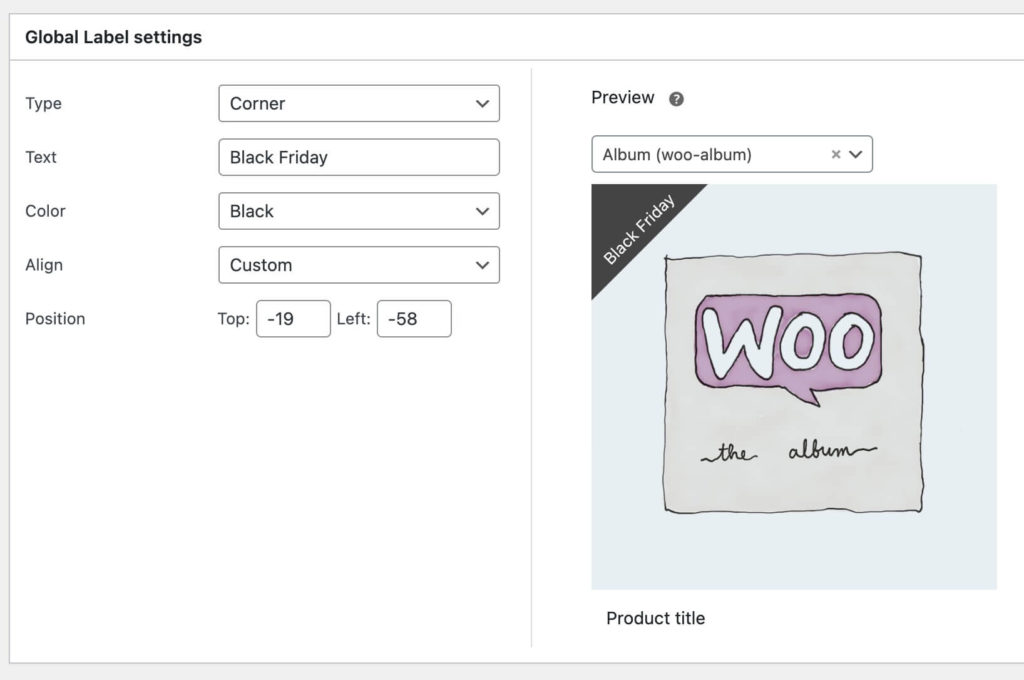
Next up is configuring the label itself. The plugin offers several label types/styles out of the box, or you can upload your own image.
Here is an example of how you can configure a label with one of the default labels.
The other alternative is to create, find or purchase a custom image. Here’s an example of a free Black Friday image configuration. Tip: You will have to resize the image to fit your images, this can easily be done in the WordPress media library.