Adding a banner to your website/web-shop can be one of the most effective ways to communicate a message to your customers. Do make sure to implement it correctly and only do it for important messages, no-one needs to know you’ll be closed for a major holiday when thats expected.
Great examples for site-wide banners are for when you have a large (site-wide) sale, have special opening times (e.g. in the Netherlands we have a 2nd easter day where certain locations open their doors at certain times).
Adding a Site-Wide Banner Within WooCommerce
The first option I’d like to show you is by using the native store notice that is available in WooCommerce. You can find this by going to Appearance > Customize >WooCommerce > Store Notice.
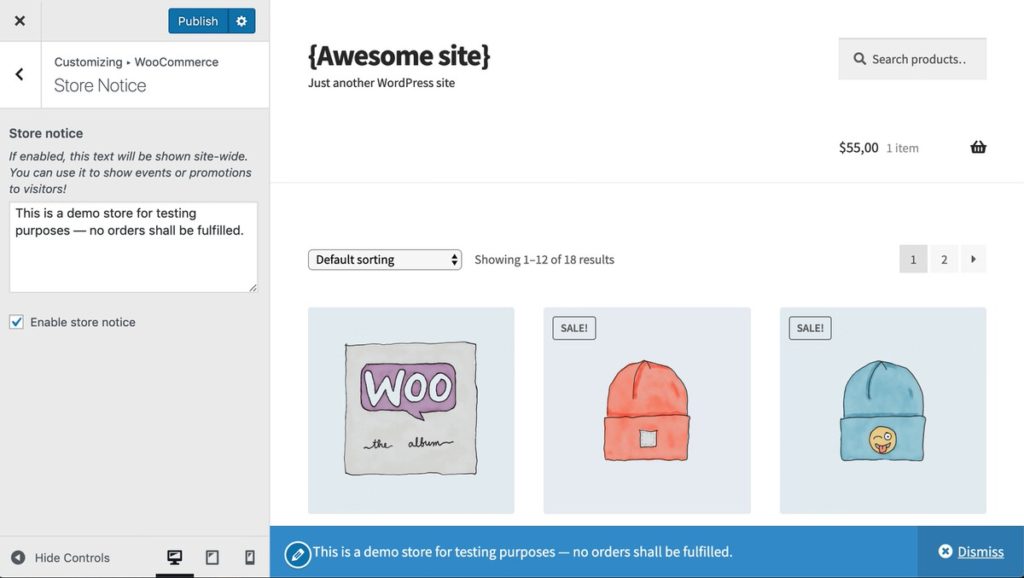
Here you can set a customizable message that will be displayed on your site. Where this will be displayed and how it looks depend on your theme. For the Storefront theme it shows on the bottom, bit for a lot of sites it will show at the top of the page.
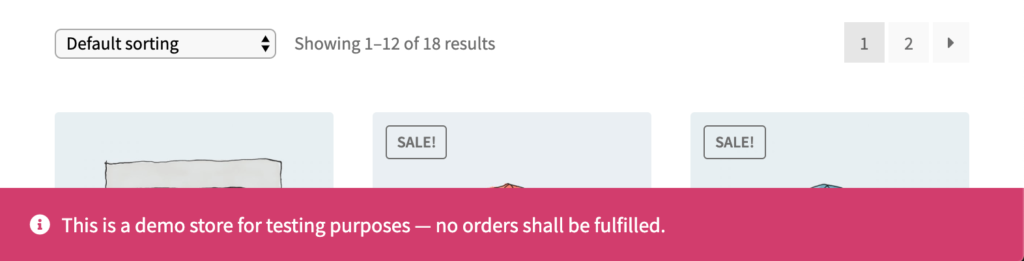
The text on the banner can easily be modified and it is dismissible out of the box. Changing the style of the banner is easy enough by adding a small CSS snippet.
.woocommerce-store-notice {
    background-color: #d23d6d;
}

/* The following will hide the dismiss link */
.woocommerce-store-notice__dismiss-link {
    display: none;
}

/* Clear enough space for footer content */
.body {
    padding-bottom: 57px; /* Change to padding-top if at the top; adjust value according to banner height */
}
I’ve also added a additional couple of lines that you can keep/remove according to your needs. The last additional block in the snippet I added because the banner was overlapping with my footer, this block clears enough space below the footer where the banner will fit properly.
(be aware that if the banner is dismissed the space will remain there)
Creating a Custom Site-Wide Banner
The other option is to create a custom site-wide banner, through a code snippet this will give more flexibility so you can schedule it for example for on specific days of the week, schedule it in between two dates, on specific pages or to only show for specific users.
The code snippet below adds the required HTML to the page for a simple banner. Below is the CSS that will style the banner.
.site-banner {
    position: fixed;
    top: 0;
    right: 0;
    left: 0;
    padding: 1em;
    background-color: #d23d6d;
    color: #fff;
    z-index: 9998;

    /* Optional */
    text-align: center; /* Center the text */
    bottom: 0; top: unset; /* Align at the bottom */
}
.body {
    padding-top: 57px; /* Additional space at the top of the page  */
}
From a style perspective this does not look a lot different from the other banner. With the above styling this is positioned at the bottom of the page, but by removing the last line of the .site-banner block it will be positioned at the top.

Scheduling a Site-Wide Banner
The snippet below is a different variation of the one shown before. This banner is one that is scheduled to be shown between two dates, which you can of course change to your desired date/times.