One thing I hear a lot from people who are new to WooCommerce are the issues they’re having configuring and understanding how the shipping options work. With this blog post I hope to give you some helpful information and tips around the topic of shipping zones and configuring shipping options in general.
The topics discussed in this post are not linear – so if wanted you can skip to a different section (heading). Only the Shipping Debug Mode section is a recommended read if you’re not yet familiar with it.
Definitions & TakeAways
Shipping methods: Shipping methods are a ‘type’ of shipping in the WooCommerce code base. “Flat rate”, “Free shipping” and “Local pickup” are the three WC Core shipping methods. Shipping methods can have multiple shipping rates related to it.
Shipping rates: A shipping rate is what is actually shown as a option to the customer. Its a instance that is related to a shipping method (type).
Shipping classes: Shipping classes do not do anything on their own. They’re simple ‘tags’ you can assign to products used to identify different types of (shippable) products.
Takeaways
- Shipping rates may not be displayed/calculated when the customer address is not fully filled out.
Shipping Debug Mode
WooCommerce is natively optimized to store any retrieved shipping rates based on the cart contents and the customer address. This prevents WooCommerce from having to do more resource intensive processes when the cart/order totals table updates without a address / cart content change.
This can have a significant impact on a production site, but while still configuring and testing a site it doesn’t matter much. Enabling the shipping debug mode is recommended to prevent getting these cached rates. Prevent yourself from getting unexpected results while you obviously made that change in the admin just now..
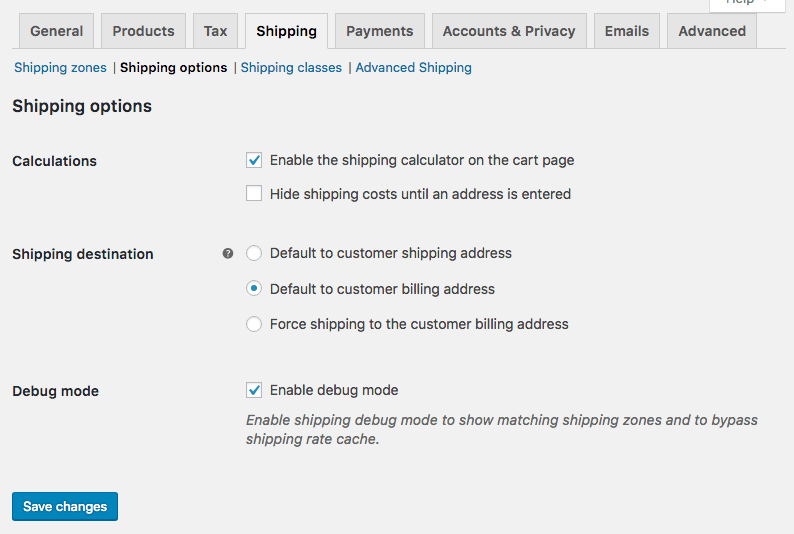
Shipping debug mode can be enabled from the WooCommerce > Settings > Shipping > Shipping Options page.
You will notice that the shipping debug mode is enabled when you see this notice on the front-end when Woo is calculating shipping rates;

Do make sure to turn it off again when your site goes live!
Billing / Shipping Fields
WooCommerce has options to allow for the customer to enter a different shipping address compared to the billing address. By default a new customer will only see the billing fields at the checkout, and a option to select a checkbox to “Ship to a different address?”. Checking that option will expand additional shipping address field accordingly.
The “Shipping destination” setting on the WooCommerce > Settings > Shipping > Shipping options page is what influences the behavior of the shipping fields. There are 3 options, I’ll least each below with their behavior accordingly.
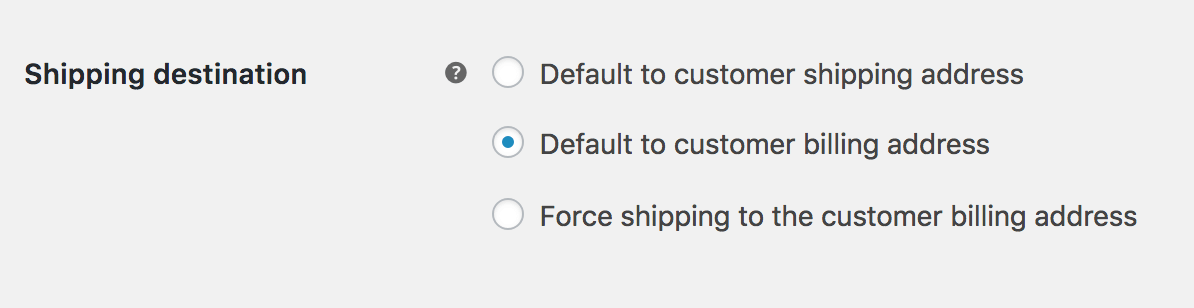
Default to customer shipping address
This first option causes the “Ship to a different address?” checkbox to be checked and the additional shipping fields to be displayed. This can be convenient if a large portion of your customers are inclined to use this. If this is not the case I’d recommend against using this option to reduce the number of fields visible on the checkout by default.
If however you want to force the customer to enter both their billing and shipping address separately you can use this option and read how you can remove the checkbox on the checkout that would allow the customer to turn it off; Remove the ‘Ship to another address’ option.
Default to customer billing address
This setting is what works best on most shops. Have the billing address be the shipping address by default, but allow the customer to enter a different shipping address through the checkbox option at the checkout.
Force shipping to the customer billing address
The last setting removes the option to ship to a different address completely and forces it to the billing address as it indicates.
Shipping Zones
Shipping zones is the main area where you can configure shipping rates. A shipping zone is a area that can be refined by country, state and zip- / postcodes. Each shipping zone can have multiple shipping options, each which will be available to the customer as a option to choose from.
Only the First Matching Zone
If I had to pick one thing that is unclear to a most new people to WooCommerce it is this. Only the first shipping zone that matches the customer location will be used. This means that only the shipping options from that zone will be shown, and any other options from zones may be discarded.
This is likely done from a optimization standpoint, WooCommerce simply stops checking/processing other zones when it has found a shipping location that matches the customer. Here’s is an example of how you should not setup shipping zones;
Because Hawaii / Alaska are matched for the United States and only the first matching shipping zone will be used, the shipping zone and thus custom rates for that zone will be ignored.
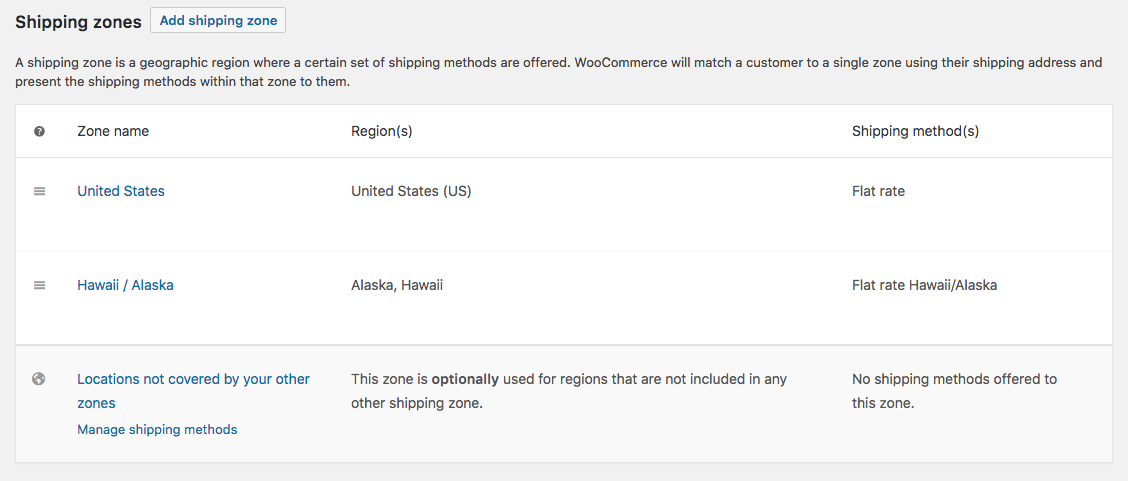
Instead make sure the more refined state selection is ordered before the United States in the list of shipping zones like so;
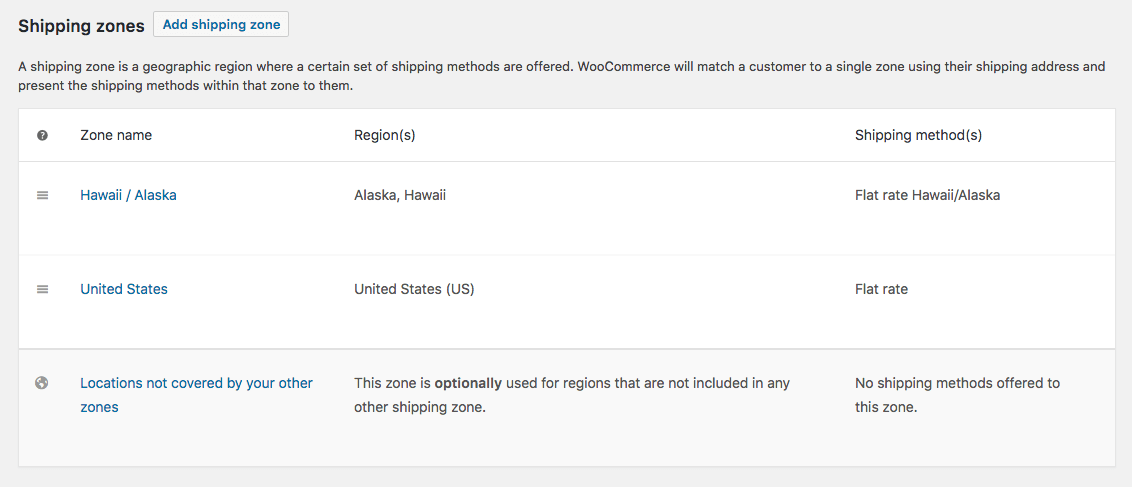
Rest of the World Zone
There’s one shipping zone at the bottom – “Locations not covered by your other zones” – that will be available to setup shipping rates for the rest of the world. I’ve listened to many people being confused about this – this only covers locations that are not in other zones, its not a ‘show for all zones’ type of option.