Do you know Amazon? Silly questions.. of course you do! One of the things I love about them is the ability to see when your product is expected to arrive and how much time I have left to order to get it by that date.
Showing these data can increase your conversion rates incrementally, but it should give the customer mostly a informed and trusted feeling about your shop and what to expect when ordering their product.
In this post I’ll show how you can configure that for your own WooCommerce site using the Advanced Messages plugin. I’ll be cutting this post into two main sections, one part for the delivery estimate, and the other for the Dispatch cut-off time. Note that these messages will be based on your own timed estimation, it doesn’t get them via a shipping carrier for example.
Showing a Delivery Estimate
A delivery estimate is meant to give the user a indication on when to expect their package to arrive. If you know the average time for your shipping carrier to deliver the order you’ll be able to place this data on your website. For a customer its great to see when they can expect their package and make a better informed decision.
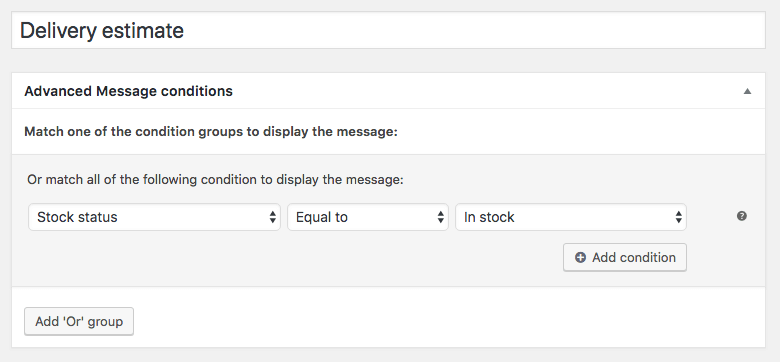
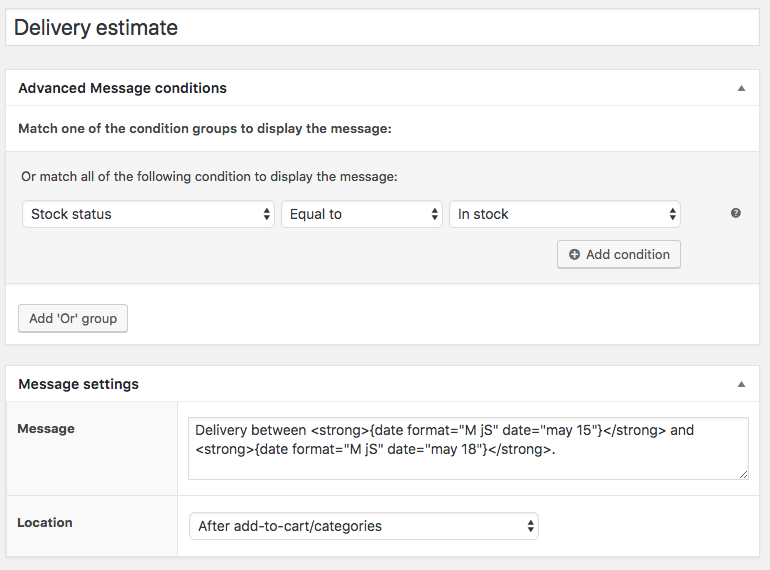
Once you’ve installed the Advanced Messages plugin, go ahead and create a new message. The conditions will depend a bit on your exact requirements, but what is most likely the case is that you’ll only be able to show a delivery estimate for products that are in stock. So lets start configuring a condition to ensure this message only shows up for products that are in stock:
The next step is to enter the location where you’d like to display the message, and the message itself. I like the ‘After add to cart/categories’ location most for this type of message.
I’d like the delivery estimate text on the page to show something like this:
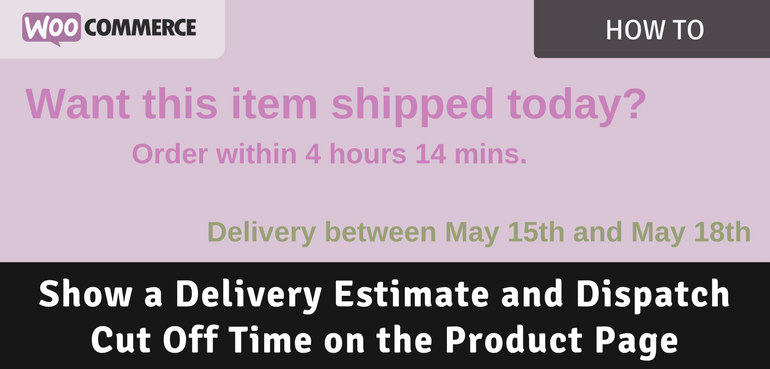
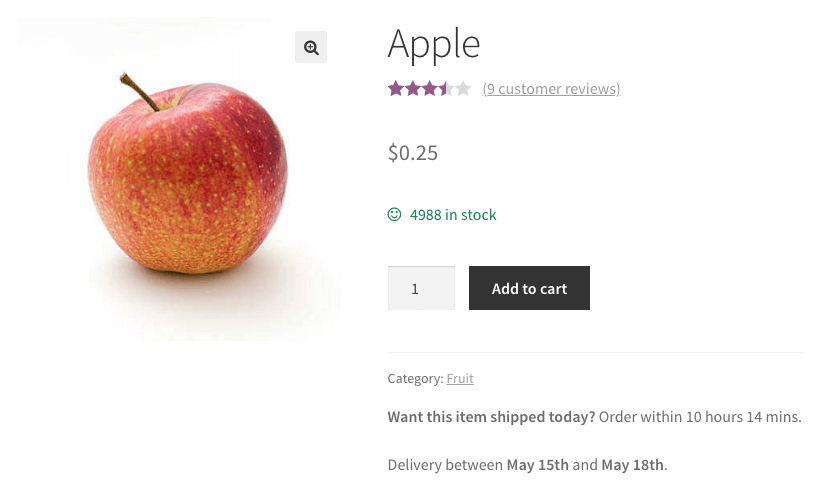
Delivery between May 15th and May 18th.
To accomplish that you can set the message text to the following:
Delivery between <strong>{date format="M jS" date="+1 weekday"}</strong> and <strong>{date format="M jS" date="+4 weekdays"}</strong>.Using the {date} smart label you’re able show a dynamic date based on the current time. In my case I simply add +1 and +4 weekdays to show the delivery estimate, you can modify this for your exact requirements of course.
The configuration and result for this message should look like this;

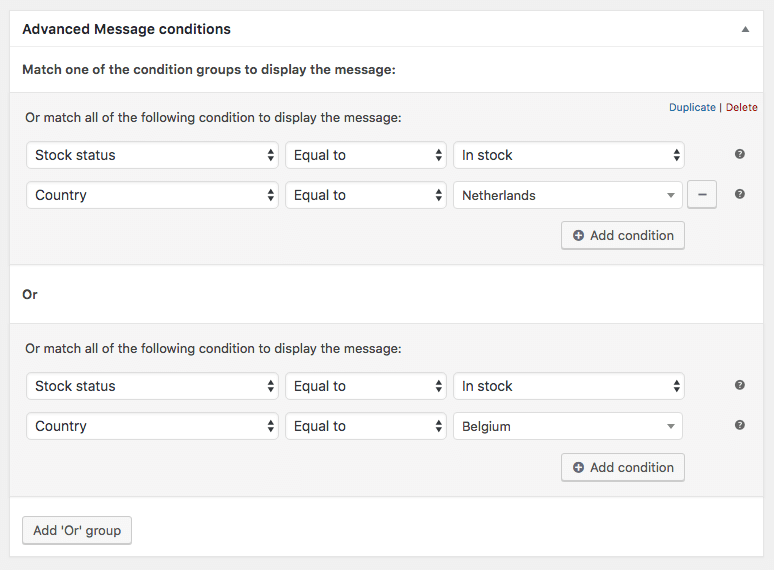
Its unlikely its going to take the same amount of time for every country internationally if you offer that. To take that into account you can setup a different message / estimate for each country/countries/continent accordingly using the ‘Country’ condition.
Showing a Dispatch Cut Off Message
A dispatch cut off message is great for the customer experience because they’ll know that their order will be on its way quickly when they order, giving them more trust in your site and increase the chance of a conversion.
For a proper dispatch cut off message you’d want to ensure it doesn’t show on certain days, assuming you don’t ship orders during the weekend you can configure the message as following;

Same as the delivery estimate, we ensure this message only shows up for products that are actually in stock.
I’d like the message to state something like the following;
Want this item shipped today? Order within 4 hours and 20 minutes.
Similar as how the {date} smart label was used for the delivery estimate, there is also a {time_left} smart label that can be used for the dispatch time. To get a message like the above I’ve configured the message with the following text.
<strong>Want this item shipped today?</strong> Order within {time_left time="6:00pm"}.In this message I’ve configured the smart label to show the time that is left until 6:00pm. The {time_left} smart label displays this automatically as a human readable text.
After 6:00pm
You’re probably wondering what will happen after 6:00pm? The {time_left} actually doesn’t look at future or past times and just gives back the difference between the current time and the entered time. So when its 7:20pm for example it will convert to “1 hour and 20 minutes”.
To get around that you can can configure the message to only show until 6pm accordingly.
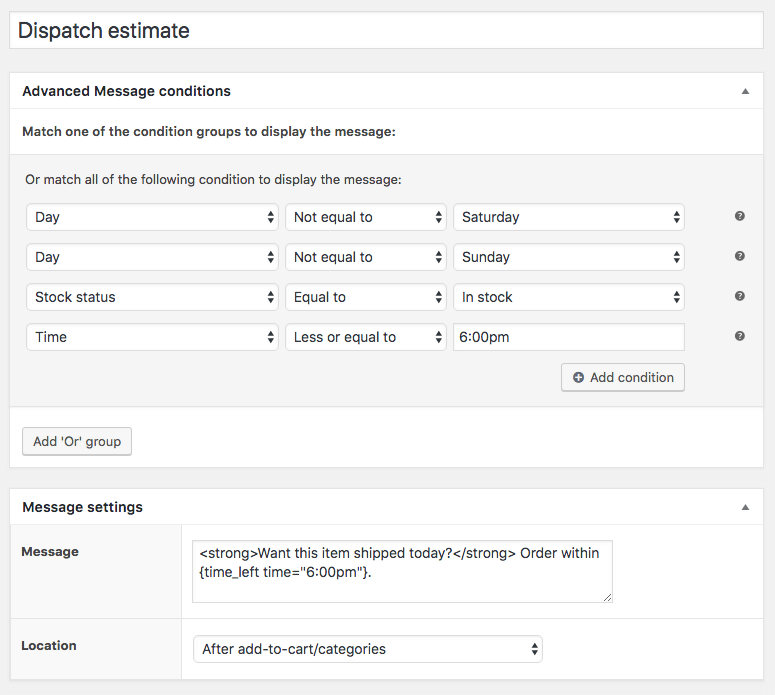
I’d also recommend to setup another message that shows a message like “Want this item shipped tomorrow” after 6pm.


Now it will show a proper shipping cut off message depending on the day of the week and time of day.
Closing words
I hope you’ve found this a useful post to learn how to setup delivery and dispatch related messages. Feel free to ask me any questions in the comments or through one of the contact forms.
Learn more about the Advanced Messages Smart Labels usage in this post.