Before eCommerce data will be received in Google Analytics (GA), you need to set some things up in Google Analytics itself. You can follow the steps in this documentation to get your data tracking setup.
Configuring your site
Lets start by configuring the settings in your site. You first need the UA code that you can find in your Google Analytics dashboard. Copy that UA code to the settings field on the EDD settings page under the ‘extensions’ tab at the ‘EDD Enhanced eCommerce Tracking’ area.
Configuring EDD for Google Analytics Enhanced eCommerce
Universal analytics
Google Analytics Enhanced eCommerce relies on Universal analytics, so the first requirement to setup Universal Analytics.
Creating a new view
No matter if you have an existing set of data in your GA or starting in a new account, it is wise to have a RAW view, and a view for the eCommerce data. You can create a new view by going to you GA dashboard -> ‘admin’ -> ‘view’ -> Click on the drop down and you can create a new view from there. 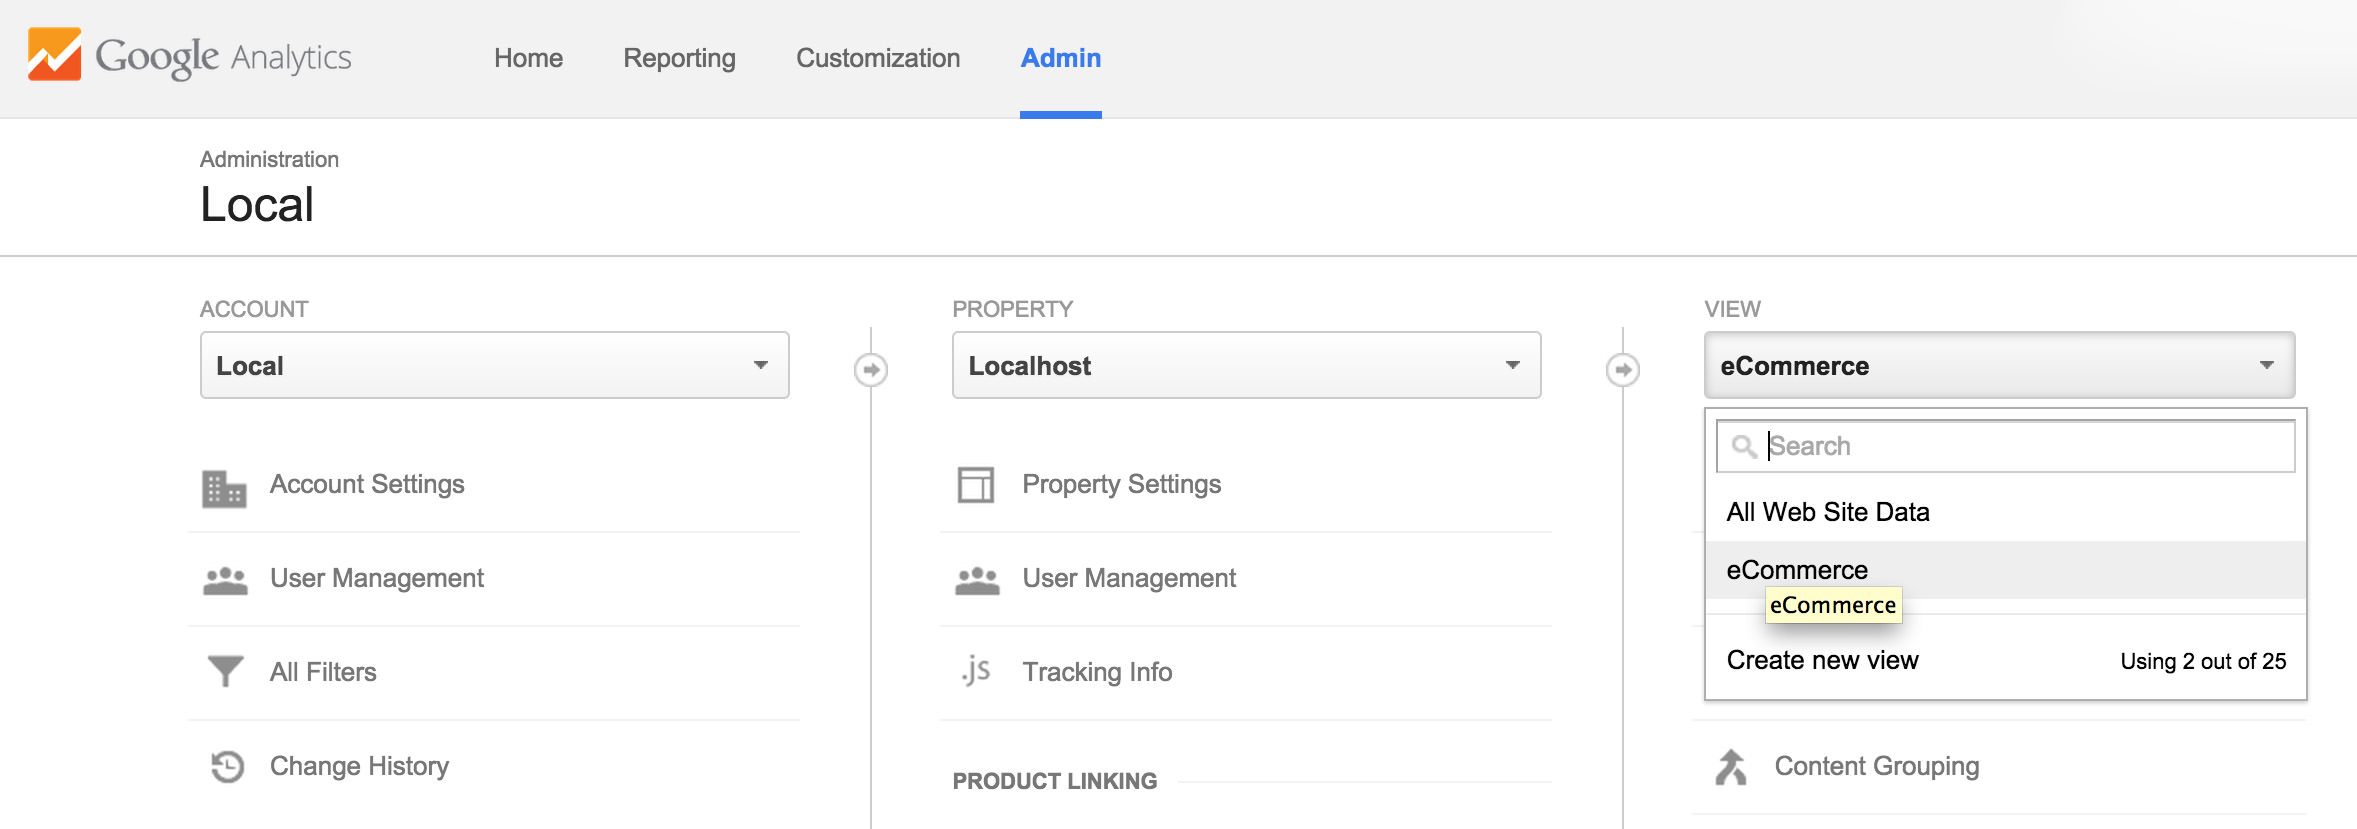
Enabling Enhanced eCommerce
Go to ‘Ecommerce settings’ in the view you’ve just created. Here you will first have to activate normal eCommerce tracing, and after that you will have the option for enabling ‘Enhanced eCommerce tracking’. 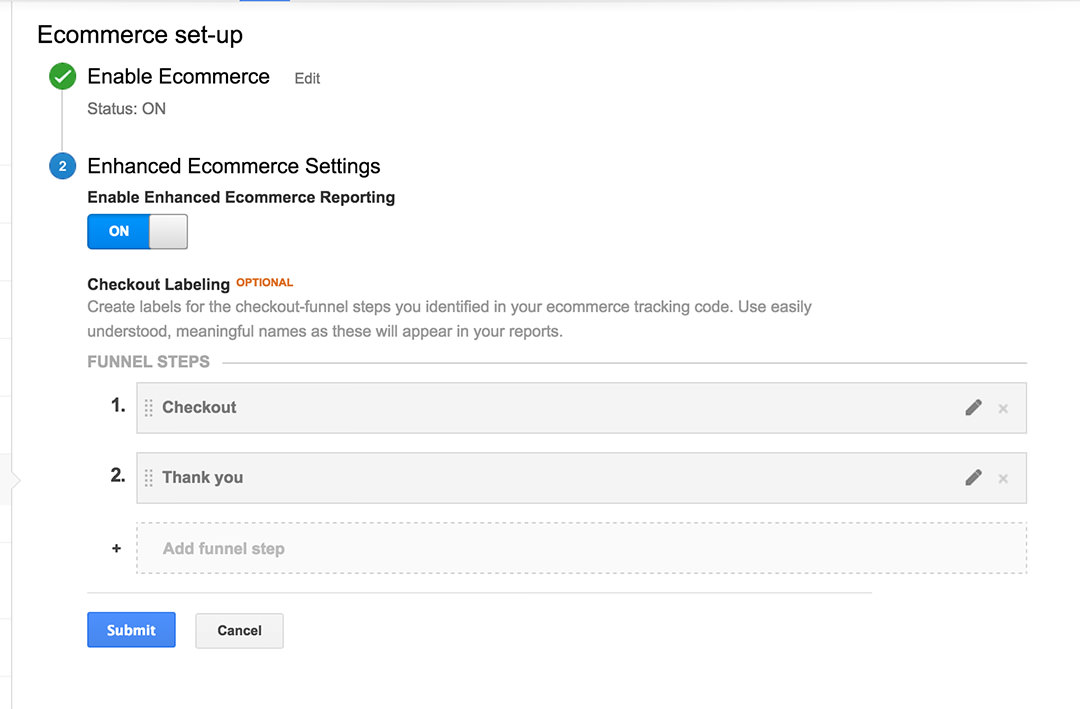
After you’ve enabled both Ecommerce settings, you will have the opportunity to give labels tot he checkout steps. You don’t have to set these labels, but it will help you in the eCommerce reports to identify the steps. I suggest giving the same labels as above.
Using a shopping cart
If you are using a separate cart page on your website, you can add ‘Cart’ as your step 1. Also, if you are using a cart, you need to check the checkbox in the EDD Enhanced eCommerce Tracking settings area.
Tracking method
Since version 1.2 the plugin has a new setting that allows you to change the tracking method. Google Analytics offers 3 different ways of sending data to their servers; Measurement Protocol (what has been used by default pre 1.2), analytics.js and gtag.js. You can now decide for yourself which tracking method you’d like to use. By default gtag.js will be used as that is the latest implementation made available by Google Analytics.
Measurement Protocol
The Measurement Protocol sends the data from your server to Google Analytics, this is a server-side based implementation. This means that the visitor cannot influence this, but does put some additional workload on your server.
If you’re using a page cache solution this will likely not call the PHP service at each request, which would result in missing tracking data.
Analytics.js / Gtag.js
Both analytics.js and gtag.js are very much alike, in fact gtag.js makes use of analytics.js. These are client-side based tracking script, which means that the tracking data will be send from the visitors browser. When a visitor has javascript disabled (which is not very common in general) or if tracking scripts are disabled by the browser or a extension the tracking data may not be send over.
These tracking methods work better with page cache solutions.
Viewing the first data in Google Analytics
You’re likely very eager to get things started and viewing the data in Google Analytics. Unfortunately Google Analytics officially states it can take up to 48 hours to show the transactional data for the first time. In reality this is usually earlier, but can easily take 24 hours.
The best next steps to take it to at least do 1 test transaction per day, and check back in Google Analytics the next day to see if the data comes in. By default Google Analytics will only show data of the previous day(s) and not from the same day either way.
Feel free to reach out through the support channel if after 48 hours after the first test transaction still no data is visible in the reports.
Other Google Analytics tracking codes
EDD Enhanced eCommerce Tracking is added the tracking code automatically to the pages for you. Make sure to remove any other tracking codes you may have on the page to ensure the data isn’t coming in double in your analytics.