Advanced Messages for WooCommerce
This is a getting started guide for WooCommerce Advanced messages.
Configuring your first Advanced Messages
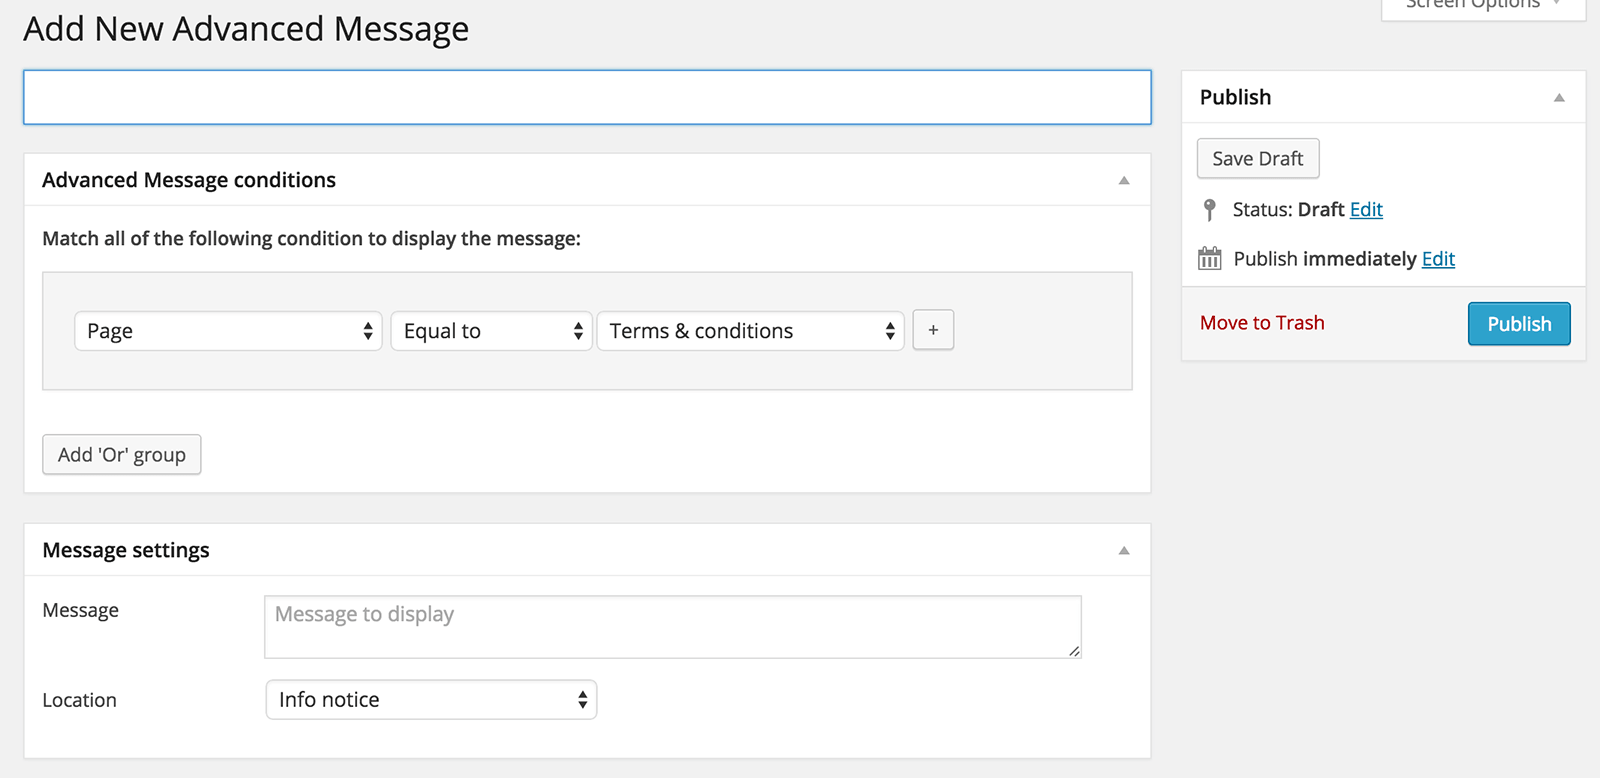
When the plugin is installed a new settings page will be added to ‘WooCommerce’ -> ‘Settings’ -> ‘Messages’. At first you will see one option to enable/disable the messages, and below that a table that will be empty at first. At the bottom of the table you will find a ‘Add Advanced Message’ button. Click the add button to create your first message.
Example
Lets use one of my favourite examples for this example. We are going to add a ‘ Want this item by Tuesday? Order within 8 hours and 15 minutes!‘ message to every product page.
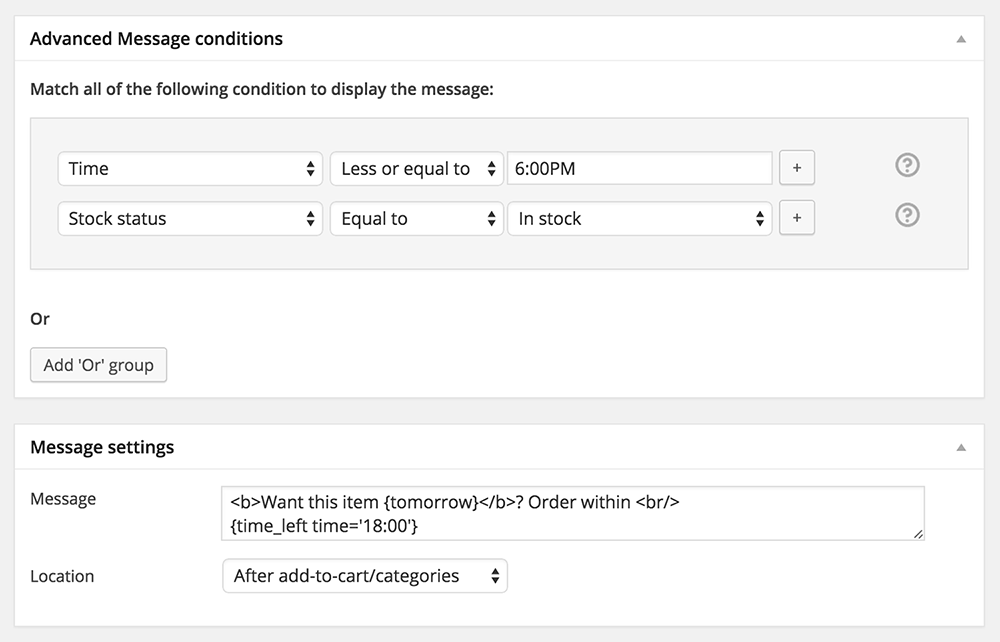
This takes in account that a person should order before a certain time on the day, since you would need some time to pack your products and ship it. Lets go for 6:00PM in this example.
1. Click on the first drop down of the existing condition, and select the ‘Time’ condition.
This condition will compare the current time, to the time given in the value field. This way you can make sure the order comes in on time for you to pack&ship it.
2. In the second drop down, select the ‘Less or equal to’ value
Using this ‘operator’ value makes sure it will be any time before the given value in the ‘value’ field.
3. Set the time to 6:00PM in the value (third) field
You can set it to 6:00PM or 18:00 if you are using the 24 hour clock. It doesn’t really matter what you use, both will work.
Those three steps are enough to get started with the conditions.
Message Settings
There are two clean settings you can set in the settings meta box. ‘Message’ and ‘Location’.

Message
You can enter the message you want to display to the user in the ‘Message’ field. I’m using the following text in the message field. You can of course customize it to your needs and requirement.
<b>Want this item {tomorrow}</b>? Order within <br/> {time_left time='18:00'}
To those who are not that familiar with HTML, there are two different HTML tags in there, the ‘<b>..</b>’, which will make your text bold, and the ‘<br/>’ which will insert a newline.
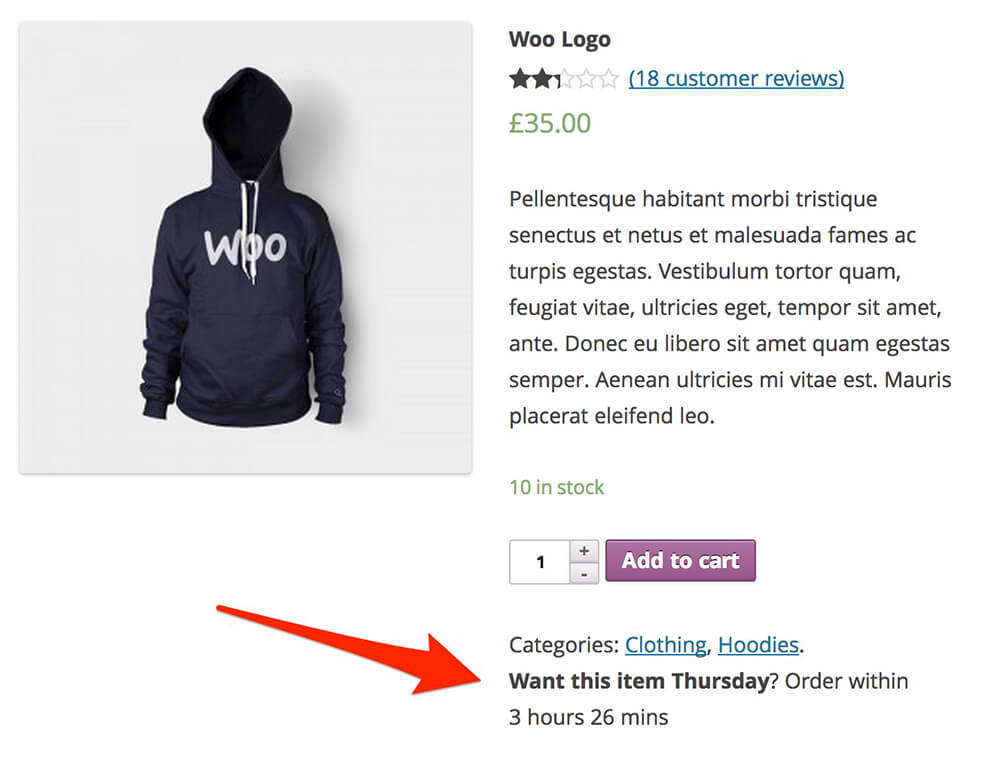
Something else noteworthy are the “{tomorrow}” and “{time_left time=’+1 day 20:00′}”. That are what I call ‘Smart Tags’. Those can be used to replace static texts with dynamically filled field. In this example the “{tomorrow}” will be replaced by ‘Wednesday’ (if its tuesday today). The “{time_left time=’18:00′}” will be replaced by the amount of hours/minutes left till that time. This might seem strange and difficult for some people, but rest assure, once getting started with it its pretty easy, and there is a more extensive docs on all the available WooCommerce Advanced Messages Smart Labels.
Location
The last field that needs to be set is the location field. This decides where the message should be shown. For this message, the ‘After add-to-cart/categories’ is the best position. It will show on a nice position, just after the add-to-cart button and the categories that are shown.
The result
The end result will look something like this;
Making sure the product is in stock
When adding such a message, it might be good to know your products are in stock, and that they can be shipping right away. For this you can set the ‘stock status’ condition. You can do this by clicking the ‘+’ button at the right of the existing condition. That will add a new condition, and you can select the ‘Stock status’ in the first drop down. In the third drop down you will be able to select ‘In stock’ to make sure the product is in stock to show the message.
Backend result